Pages

Sunday, 13 March 2016

BurdaStyle 12/2015 - 110A Dress

It feels like ages since I made a dress from BurdaStyle, there was a time when I made almost nothing else.  I really liked the lines on this dress, although I'm not sure how often I will have the occasion to wear it, long sleeve season is pretty short here and this dress is quite formal.

http://www.burdastyle.com/pattern_store/patterns/34-sleeve-dress-122015


I cut a 38 grading out to a 40 below the waist and made a few adjustments during construction:

  • This was the tall pattern, designed for heights of 5'9 rather than 5'6.  I shortened the dress by around 4 inches so that it was knee length on me.  I'm sure the pattern is drafted with extra length in the torso too, but I didn't find it necessary to alter anywhere other than the hem.
  • I found the sleeves to be really narrow so I had to recut them in a bigger size which of course gave me all kinds of problems setting in the sleeve.  There is a dart at the top of the sleeve which is supposed to be sewn at the same time as the shoulder seam, but I found it much easier to get the sleeve in by stitching the dart first and then setting it in the standard way.  It doesn't look as smooth done this way, but I'm treating it as a design feature!
  • I ditched the neck facing and instead used a folded bias strip to finish the neckline.  I topstitched the neckline to secure the bias strip and narrow hemmed the skirt and sleeves.  I find some fabrics are impossible to hem invisibly and I'd rather have neat machine stitching showing than my imperfect (not) invisible hand stitching.

The pleats in the skirt are held in place by a piece of lining that acts as a stay, it's a really nice feature.


The fabric I used is a navy drapy dress fabric, probably a poly crepe.  It has a nice weight and drape, but is not easy to press well.  The magazine sample uses a jersey for the short version and a stretch crepe for the maxi version although the fabric recommendations are "dress fabrics with or without elastane".  Some stretch would have probably avoided my tight sleeve issue, but otherwise it's true that stretch is optional.

Taking photos of navy clothing is as tricky as black, but hopefully you get the idea.  It's a cute dress, I just need to find somewhere to wear it!


Thursday, 25 February 2016

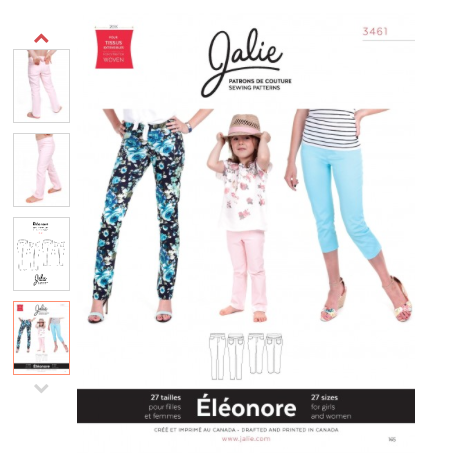
Jalie 3461 Eleonore Pull-on Jeans


This Jalie pull on jeans pattern has proved really popular and I was curious to try it having only ever made Jalie tops before.  I used a medium weight stretch cotton sateen that I really thought was dark olive in the store when I bought it, but is clearly chocolate brown.


I used the size that corresponded to my hip measurement and the fit was pretty good except for some gaping at the centre back, before attaching the waistband.  I just took a wedge out of the back yoke centre seam.  I also took the waistband in at the side seams.  I made these adjustments completely independently of each other by fitting as I went so I'm not quite sure how I still managed to get the waistband to line up with the body of the pants - the wonders of stretch fabric I suppose!

The instructions, as always for Jalie are excellent and these jeans are very easy to put together.  The leg seams are sewn after the crotch seam which makes it easy to tweak the fit of the legs.  The only part that needs a bit of care is attaching the very curved front yokes to the front pieces to give the false front pocket effect.  I had to unpick one of mine as I messed it up the first time.  You could also just extend the front pieces when cutting and eliminate the front yokes altogether, but if you follow the directions to clip the curve and go slow you should be fine.


I really liked the waistband treatment on these, I haven't come across it before.  The elastic is zig zagged onto the inside of the waistband without stretching it and then the waistband is assembled and attached to the pants.  Obviously this method only works with stretchy fabrics.  I've seen a few people comment that they did stretch the elastic at the back and I might try that next time given the alteration I had to make to the fit at the waist.

This is the inside back waistband, the zig zag stitching securing the elastic in place is only visible on the inside.


Overall I really like how these turned out, they are quite quick and easy to make, very comfortable and I can definitely see more of these in my wardrobe including the cropped ones for summer.  Actually I must confess I cut a pair in navy soon after finishing these, but when I went to sew them I have somehow lost the back legs!  I really need to have a good clearout of my sewing room, they've got to be in there somewhere!


Friday, 12 February 2016

McCall's 7247 Top

This was another piece to get me through the big Asian freeze - actually it got to almost zero C in Hong Kong which is the coldest it has been for 60 years so a few new sweaters were fully justified!

This is McCall's 7247, I made view B, but with the longer back of view C/D.  Most of the reviews I've seen have been for the curved front version shown on the model and a lot of people seem to have found that it comes up much shorter than it appears on the model and that the crossover can open up. Views A/B  don't have that problem as it is not a crossover, but an extra overlay on the front.


This overlay feature was perfect for the cream coloured sweater knit I used since there is no chance of it being remotely see through on the front.

This is a quick and easy top to make, the only change I made from the instructions was to sew the sleeves in flat.  I serged the seams and used a twin needle on the hems, where I had some problems with tunnelling, but was too lazy to unpick them - at least they all look the same, I'm calling it a feature!

I made a straight size 12 with zero adjustments, have to say my last few McCall's projects haven't had the excessive ease problem that I used to have with them.  This size 12 fits my size 12 dressform really well too (definitely no vanity sizing on chinese dressforms!).


Wearing this in real life and actually moving around, that overlay does drape a bit more and can swing towards the centre front and pull on the neckline a bit.  I don't mind this, I think it emphasises the overlay more, but something to consider.  Of course I have totally failed to capture this in my photos where I wasn't moving around very much!


I was slightly put off making view A/B from the comments in some of the reviews, but I might try and modify the pattern so that the bottom layer extends right into the side seam so there is no danger of belly exposure!  Anyway, this is a good basic with a few interesting pattern variations and my cream version goes perfectly with my new brown Jalie Eleanor pants (coming next!) and will probably see a lot more outings before spring arrives.

Sunday, 24 January 2016

Style Arc Lolita Knit Top

Winter has finally arrived in Hong Kong - those of you in places currently experiencing real winters will laugh at our 5C temperatures, but the humidity and lack of double glazing and heating in most apartments make it chilly enough to need winter clothes.

I pulled out some of the sweater knits I bought recently and decided to try this Style Arc pattern which I think was one of their monthly freebies.


It is a quick and easy sew, but there is an error in the instructions although the marks on the pattern pieces and the diagram are correct.  Step 3 instructs you to sew the long edge of the collar closed and leave part of the short edge open.  This should be exactly the other way round, it's fortunate I had the pattern pieces in front of me.  I remembered Anne from Clothing Engineer (a Style Arc fan!)had made this so I double checked her review just to make sure I wasn't being an idiot.  Interestingly she found 2 errors in her pattern - the other one was to do with the order of attaching the neck binding, but this was correct in mine so perhaps there are a few versions floating round out there.  

I made a size 10, my usual Style Arc size and added a bit onto the length.  The only fitting adjustment I needed to make was to shorten the collar bands at the side seams by around an inch each side.  I expect the amount would vary depending on fabric choice so I just basted, tried it on, unpicked and repeated until I was happy with it.


I honestly wasn't sure how I would feel about having fabric wrapping over my bust, but I really like how the top turned out and in this lightweight sweater knit it is so cosy.


 The back collar detail is created by stitching tucks at the centre back seam.


I actually really like the fit of the basic top so quickly made up a plain black version without the bands.  This is the most basic of basics, but perfect for everyday and easy to layer and perk up with different accessories.  I wouldn't suggest that you get this pattern just for the basic top, but if you have it already it is an option.  It also makes me think that it would be quite easy to take a favourite top and drape your own collar pieces on.


Kind of hard to see the detail in these photos, but here you go.  Stay warm and safe everyone.


Wednesday, 13 January 2016

McCall's 7244 Dress (Plenty by Tracy Reese)

This is a Plenty by Tracy Reese design for moderate stretch knits, it's quite fitted through the bodice and has a short flounced skirt.  The long sleeves make it a great winter dress addition to my wardrobe.


You can see that I was not at all creative in my interpretation from the pattern envelope!  My fabric is probably a little heavy for this dress, but it still works - it's some kind of stretch woven, probably the weight you would normally choose for pants.  I think a ponte would work really well.


I made a few minor adjustments while making this :
  • omitted the bodice lining
  • raised the v neckline on the bodice (and the front neck facing) - probably not needed, but it looked pretty low on the model
  • topstitched the skirt/bodice seam 
  • added length to the skirt - I could only add about 1cm and then I sewed it to the bodice with a small seam allowance and used a very small hem on the skirt. to gain as much length as I could
It's a pretty straightforward dress and the instructions are clear.  In a ponte you could probably leave off the zipper and make it even quicker to sew.

Other people have said this is pretty short and it is true, ideally I'd like it a bit longer, but those flounce shapes really ate into my fabric and I wasn't able to add any more.  I'm 5'6 so this is something you may want to check and consider lengthening either just the skirt or both bodice and skirt to maintain the proportions.

Having said I'd be putting mainly dress form photos up, here is a slightly out of focus photo of me wearing it!