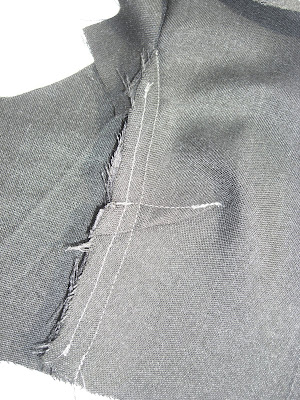
Next up for me is the Michael Kors dress 1117, this is a very early progress report so not the most interesting post I'm afraid.
The pattern is rated "average" which I think is a bit optimistic. It has an interesting cut with side front and back inserts which are not easy to sew. With the caveat that I am not much of a teacher or photographer and there may be better ways of doing these steps ( I'm certain it wasn't done this way in factory production! ), here is how I inserted the side fronts and backs - steps 7, 13, 20. For sure the pattern instructions are somewhat lacking, but the illustration does show you what you are trying to end up with.
The photos below illustrate step 13 - the left front bodice, but the basic technique is the same for all - essentially don't try and stitch to the side and underarm in one pass, instead stitch them separately stopping at the pivot point.
Here I have stitched just the side seam, stopping at the pivot point. (the line of stitching nearest the cut edge is the staystitching from the previous step). It's easiest to see where to stop if the bodice front is on top. Pin first and check from the right side just to make sure that the square piece of fabric required for reinforcement hasn't got caught in the seam. Edited to add; Told you I was hopeless at tutorials, I was so carried away with taking photos I didn't read the instructions! This left bodice seam should be left open below the dart.
Next pin the curved seam that follows the underarm, again with the bodice front on top - you can just see the pivot point from the previous line of stitching.


Stitch in place (you can see I used two rows of stitching to get it right (I finished too short of the pivot point the first time), so you might want to baste in place first!). Press and trim the seam allowances, grading them to minimise showthrough on the right side.


Step 13, the bodice back, is a little trickier in that you have 3 sides to stitch - I did it in the same way - first the side seam, then the underarm seam and lastly the seam joining to the lower dress. Looking ahead in the instructions I see that the lining is constructed similarly so there is plenty of opportunity for practice!
I hope these photos help pad out the instructions a bit. Ok, back to work on the dress.....


