Pages

Friday 25 July 2014

Vogue 1241 Kay Unger dress

I've had this pattern in my stash for a while and this fabric I bought recently reminded me of the pattern photo so I thought it was about time to try it.  I kind of wish I had tried it sooner because I love it and I think it would look good in both solids and prints.  In fact it might be better in a solid so you can see the details better.

Vogue 1241


My fabric is a stretch cotton so I planned to make a more casual, unlined version, but nevertheless it has turned out looking quite dressy.  Which is fine, a dress I can wear to cocktails and then throw in the washing machine? Thank you very much!


I made a size 12, blending to a 14 at the hips and apart from extending the front crossover (details below) I didn't have to make any other adjustments.  I'm really happy with the fit, but I'm glad the fabric has some stretch to it when I sit down.


Since I left off the lining I finished all the exposed edges on my serger, which takes a bit of advance planning to make sure you finish them in the right order because of course the instructions, which I largely ignored, give you no guidance on this (although to be fair the dress is supposed to be lined).  Alternatively you could just finish all the edges before starting to sew.  The other change related to the lack of lining is that I needed to add some facings, the original dress already had pieces for this designed for interfacing to be applied to the dress fabric so I used those.


The adjustment I made to the front crossover to avoid any gaping is the same as I did for this dress, just extending the amount of crossover, keeping the original neckline intact - but make sure you don't extend it beyond the princess seams.  I hadn't thought about this, but got incredibly lucky!  Obviously I had to make the same adjustment to the front facing too.  I handstitched the front down as well (obviously I am paranoid about gaping!) and now I look at these photos I can see that it is pulling the neckline so it doesn't sit straight - totally did not notice this is real life!  I will have to change it, right there is one good reason for taking photos for the blog!


I'm so glad I finally got around to this one and will have to dig out some of the other Kay Unger patterns I have hiding in my stash, I expect I will also be turning to this pattern again sometime.

My first lot of photos turned out rather blurry for some reason and my second lot where I tried out different locations in my apartment, the camera battery died after 3 shots.  These will have to do or we could be waiting an age for any blog updates.  Also more often than not I am unable to upload the most recent batch of photos onto my blog, I can see them in iphoto, but they are not available when I try and select them through blogger and I have to reboot the mac.  Its not a big deal, but it is annoying - does this happen to anyone else or does anyone have the solution to fixing it?


Thursday 10 July 2014

McCall's 6319 Dress

While I had my serger threaded up with black (it takes no time at all to rethread so I don't know why I do this, as good a way as any of deciding what to make next I suppose!) I thought I would tackle the border print jersey that was still hanging around from my last fabric shopping trip.  I love wearing simple knit dresses in the super hot weather we have right now, when I met up with Maria we were both wearing essentially long t shirts with elastic at the waist.  Simple easy sewing and brainless dressing, can't beat it.


I used McCalls 6319, a basic dress with a bit of asymmetry that I have made before here.  That version, whilst a gorgeous colour was not good quality fabric, it became flimsy, pilled like crazy and has had to go.  I made view A again (and again without the shoulder zipper) except I had to change the skirt portion from a bias pleated piece to a straight rectangle to accommodate my border print.


I did try to get clever here and originally cut the front skirt wider, added in some pleats and stitched it all up.  After a day of wearing it I realised it just wasn't going to work, unpicked it (no fun!) and removed all the excess fabric.  The proportion of my extra pleats was just wrong and the weight of them pulled the hem down on one side.  Also the skirt was a bit long so I shortened it from the top to keep the border intact.  All that would be much more interesting if I had some befores and afters to show you, but I don't, sorry!  Anyway here's the after, I'm glad to have this in my summer wardrobe, hopefully this one has a longer lifespan than its predecessor!


I wore it out to a casual dinner last Friday and found a couple of black and white backdrops on the way.


Next up, another black and white dress that I have just finished and then I am diving into my pile of activewear fabrics.

Friday 4 July 2014

Fehr Trade VNA Workout Top & Duathlon Shorts

I have been meaning to make my own workout clothes for a few years now so when Melissa at Fehr Trade started producing activewear patterns I took it as a sign to finally get round to doing it rather than just thinking about it.  It's still taken a while, but I am finally off the starting blocks!

This was also my first foray into the world of pdf patterns and although I was a bit daunted by the prospect of printing and taping it was really very painless and I love the instant gratification of hitting the order button and having the pattern immediately rather than waiting 2 weeks for it to arrive in Hong Kong.  I suppose it helps that the pattern pieces for clothes like this are quite small, I might feel differently about a huge ballgown.  My tip is to only cut the right hand border off each page, tape the first row together overlapping the edges, then trim off the whole bottom edge, repeat for each row then tape the rows together. Maybe everyone already does this, but I had it in my head before printing that I would need to trim off all the borders off all the pages (=boring!).

For my first attempt, I just worked with some fabrics I had in my stash to get a feel for the sizing.  My measurements put me as a medium so that is what I made with no adjustments.  Argh this is scary, major kudos to those of you who regularly post workout and swimwear photos!


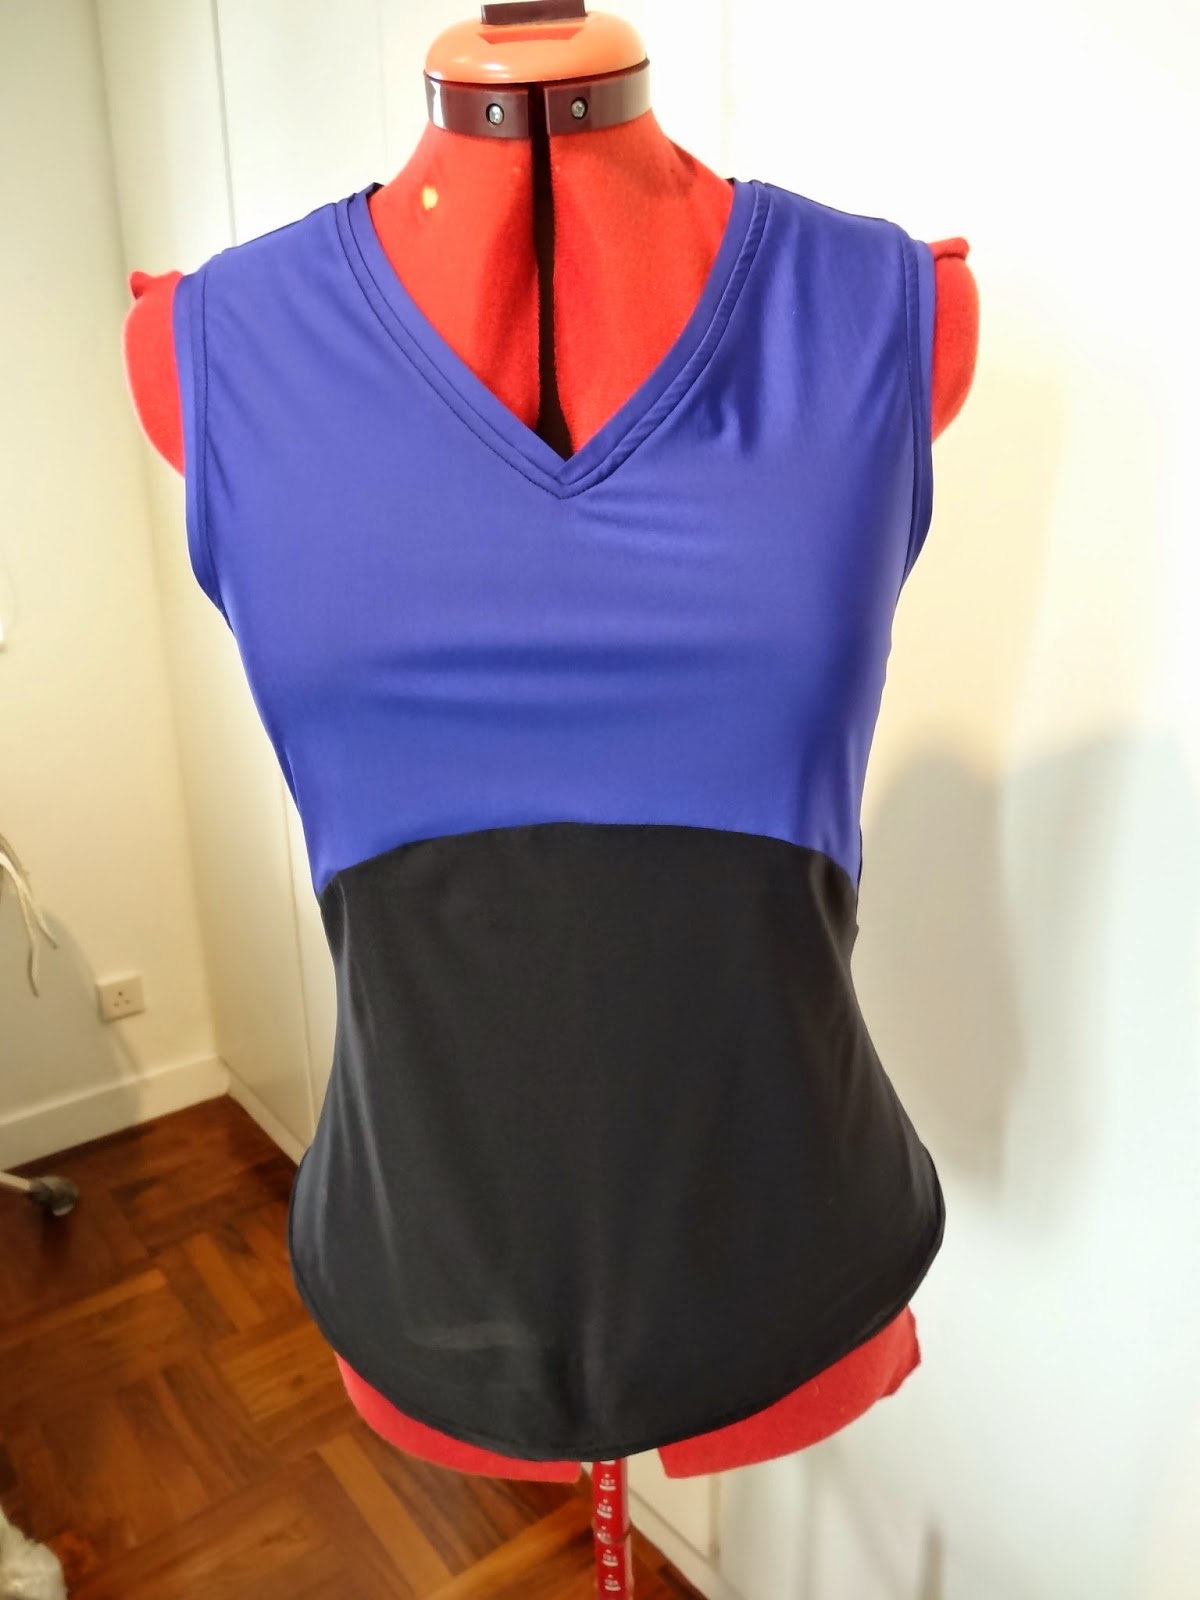
VNA Top


Inspired by a Vionnet design this top has 3 main pieces plus bindings and is a great way to use up small pieces of fabrics and create lots of different and fun combinations. I've just used 2 colours here, the purple was a bit flimsy so I underlined that piece with some of the black fabric.


I am really happy with how this turned out, the drafting is spot on and the instructions are very clear and give a great result thanks to clever techniques in applying the binding strips. Even on this first version my bindings look quite professional and I know they will get better.   The only problem on this version is that I stitched the side seams so that the underarm bindings are a continuation of the side seams whereas they are supposed to cross over, mine would not meet perfectly and frankly I was too impatient to try it on so I went with my method.  This is due to slightly sloppy sewing on my part and not the pattern, it doesn't make the top any less wearable, but the original way is more in keeping with the design - I'll get it right next time.  And there will be many next times!

Duathlon Shorts


This shorts pattern comes in 3 lengths with optional padding for the cyclists out there.  (I recently tried spinning classes, man it is such a relief when the instructor tells you to stand up on your pedals!).  These were even more of a sizing experiment, my fabric is a bit shinier than I would usually choose to wear on my bottom half.


I made a straight medium in the Capri length and am thrilled with the fit, the legs could be a bit tighter round the knees, but that can easily be adjusted. The pocket design in the side contrast is devilishly simple and clever and provides opportunity for adding 1 or 2 contrast colours.  Again the instructions are really clear and provide a great looking finish. I want to get some less spandexy shiny fabric to make these up again.

Happily this experiment also coincided with Maria the Velosewer's visit to Hong Kong, Maria makes a lot of workout clothing, you can see her stuff on her blog, so I was hoping to pick up some tips whilst we toured the garment district together.  And I did, especially with finding and choosing fabrics (e.g. I would never have thought to use a panel print, but it's perfect, the 2 different fabrics match perfectly) so now I have a whole stack to play with which cost less than 1 RTW outfit.  My magpie tendencies came out again and I went even crazier with prints than usual which is going to be quite a change from my usual head to toe black gym outfits that I am bored to bits of although I may still be waist to toe black for a bit - baby steps people!


It's been said so many times after meet ups like these that it is almost a cliche, but it is always so good meeting up with people who love to sew and even though you only know each other through the internet there is an instant connection and it feels like you have known each other for years.  We picked a sweltering day to meet and shop so it was quite the workout, appropriately enough, especially with the added "handweights" I accumulated!

Thank you Maria, I had a brilliant afternoon and hope you will be back!