Pages

Friday 23 December 2016

Style Arc Billie Tops

I liked this unusual draped top pattern when it was first issued and I don't know why I didn't buy it, but I didn't, it went out of print and that was that.  However when Style Arc had a Black Friday sale of the pdf patterns in their Etsy store I had a browse and found Billie there so I snapped it up.  Finding anything on that site is a bit hit and miss and I much prefer to go through the main site, but if you know what you are looking for you can search for it on the Etsy store.  Here is the link to the Billie search page.


There is only one crazy shaped pattern piece (plus facing pieces which I did not use) so provided you keep the pattern piece nearby so you can figure out which bit is what, this is an incredibly quick and easy top to put together.


If you have faith miraculously it turns out exactly like the line drawing!


I made two versions, the first in a sequin fabric for the holidays and the second in a printed ITY jersey.  I think it is much more successful in the sequin fabric, partly because the weight of the sequins makes the drape hang better, but also I think this just works better in a solid otherwise the drape detail is lost in a busy print.  I have some solid cotton bamboo that I plan to try this in and I'm also curious how it would look in a drapy woven.  It definitely needs something slim on the bottom half to balance out the volume - basically exactly as Style Arc show it in their illustration.


There really isn't a lot to say about construction because there is so little of it - make a pleat and sew three seams!  As I mentioned I left off the facing pieces and just used self fabric to bind the neck and arm edges.

Sewing with sequins required a bit of extra work, but I didn't use the generally recommended method of unpicking sequins from my seam allowances.  Instead I just covered the seams and edges with some scraps of jersey, a method I have used before, so much quicker and works for me, but if you have very sensitive skin it might be better to go the couture road or underline the whole thing.  


You can see below why the print version doesn't work as well - the drape detail is lost and it just looks like an oversized t shirt.


The party version is much better!


Friday 9 December 2016

BurdaStyle 09/2012 - 112 Blouse

(I recently set up a separate instagram account for my sewing stuff, those of you who have already found it will know that I started this blouse ages ago, but it is finally finished.  For anyone else interested my instagram account is allisoncsewing. )

I have to admit I find making shirts or blouses quite tricky, although I am sure that the more you do it the better you get.  They seem to require a level of patience and precision that I don't really possess!  However I do like wearing them and find it hard to get a good fit in RTW so it's a worthwhile skill to improve on.

I chose this pattern because I liked that it had front princess seams and also front and back darts for fitting - I didn't want any gaping buttons, but I did want some waist definition.  The gathers at the front yoke also help with the fit over the bust.  Ironically I didn't like how the front darts looked when I basted them in so I added a bit of shaping at the side seam instead.

http://www.burdastyle.com/pattern_store/patterns/printed-blouse-092012


You don't need to go very far through my blog to realise that I have a bit of a thing for purple, this fabric is a lovely silk of some sort, it has a slubbed look and a cotton/linen feel.

I didn't do anything special here, just took it slowly and hand basted the collar and sleeve plackets before machine sewing.  I'm pretty happy with the end result.


Tracing this was horrible as the pattern lines were red and when they are on the same sheet as the pink printed featured pattern are hard to see.  Also the same base pattern pieces are used for version 111 and dress versions 113 & 114 and it's easy to trace the wrong variation.

The instructions are fine, I changed the order so that I did the collar before the side seams as I find it much easier to handle that way.  I got annoyed that they referred me to a totally different kids dress pattern for instructions on sewing the sleeve vents so I pulled out my trusty Sandra Betzina Power Sewing book instead.  I tend to use internet tutorials these days and had forgotten how much great information there is in this book.

The sleeves are too long on me, I was so focussed on the fit through the body that I didn't even think to check them before completion and there was no way I was redoing them at that stage!  I can confirm right now that they are actually just right for typing in and I suspect holding a glass in, I will test that in an hour or two as it is Friday night here!

Getting around to buttons and buttonholes took forever and I decided to borrow a pair of my husband's cufflinks for the double cuffs (he doesn't know this yet!), I really like them, this could be a new thing for me!


 Lousy flash photos to follow....


Saturday 5 November 2016

BurdaStyle 11/2016 - 105 Metallic Knit Top

It's quite unbelievable that I have not only made, but blogged something from the November issue in the first week of November!

Ok so I made something easy, the 105 raglan sleeve top with a tie at the hips.  Also available as a sleeveless halter style, 104.

I can only find a link to 104 on the BurdaStyle site, it's the same pattern pieces, other than the sleeve so I wonder if they have bundled them together.  Or I have made this so fast they are still posting the November stuff!  If you buy the pattern as a pdf from the website you'd be better off getting 105 with the sleeves so you get value for money.

11/2016 - 104 (sleeveless version)

The images below are from Burda Russia.


This is a pretty straightforward top, although I made a couple of modifications which sped things up a bit.  I left off the front neck split because I didn't think my fabric would behave and I also left off the slits in the raglan sleeve seams because they would just show my bra straps.  I did put in the back neck split in case I wouldn't be able to get it on over my head, but didn't have a suitable button so I ended up stitching it closed just at the top.  The instructions say to finish the neckline with some braid, I just used a doubled facing strip turned to the inside.


In my last jacket post I mentioned looking past the fashion photographs and checking the technical drawings instead and many of you commented you did the same.  This is one case where looking at the photos does give you a truer story than the drawings as Fehr Trade  highlighted in her recent review of the magazine.

You can see that even on this leggy model  and with the ties at the side rather than centre they reach her knees!
In both photos the tie looks really long and is tied at the side, the line drawing looks quite normal and is tied at the centre.  In fact the ties are ridiculously long, I chopped about 12 inches off each one!  I did this at the end because I was not unpicking my finished side seams, but it would be better to do this adjustment upfront and take the length off the end that joins the side seam.

Also bear in mind that the wrong side of the tie may show especially if you knot it so if your fabric has two different sides and is lightweight enough you may want to double the ties.  I would have had enough fabric to do this if I had known about the tie length issue, grrr!


Fabric suggestions for this version are listed as:
  • Softly draping fabrics.
  • Jersey
which makes me think this could be made up in a non stretch drapy fabric with a functioning back fastening.  I might try this as despite my grumbles I do really like the top and it is quick and easy to make and works well with skinny jeans.

Finally switched off the air conditioning this week so I am thinking about cooler weather, the changing seasons and dare I say Christmas!  This metallic version will be perfect for casual holiday parties, I admit it's kind of 70's disco, but fun.

For a glorified t shirt I seem to have a lot to say about this pattern, so I will end now with photos of me wearing it.  (The jeans I am wearing are also Burda - 3/2014-115 blogged here)


Saturday 29 October 2016

BurdaStyle 06/2016 - 121 Jacket

It feels like a long time since I made a jacket which is odd since I love wearing them.  I decided I needed a simple unlined zip front cotton jacket and started digging through my BurdaStyle magazine stash (always a dangerous black hole to get into!).  Of course there were plenty of options, but having banged on and on about what a great year 2016 has been for Burda I felt I should make something current.

Now I am quite partial to a military styled jacket, however this one was shown in such a way that it almost veered off into costume territory, but the line drawing showed promise.

06/2016 - 121
06/2016 - 121 

06/2016 - 120 Cropped, zipped version
06/2016 - 121 Longer hook & eye version
I made the longer view (121), but with the zip from the cropped version (120) and omitted the tabs on the front.  Just for your information on the longer version they are cut in half and meet at the centre front seam which is finished with hooks and eyes, on the cropped version you would have to unbutton one side to get to the zip so you'd need to be committed to only wearing it done up if making that version.

This is actually a tall pattern, but apart from shortening both the sleeves and the bands by 1.5cm each I didn't make any alterations.

The jacket goes together quite easily and even the basic pattern has some nice subtle details - I really like the way the back wraps over the shoulder, the little double vent at the back and the cut of the sleeve makes it hang beautifully.  I wish I had taken photos as soon as I had finished it, but I washed it first since I had stabbed myself with pins and bled on it and just working with it had made it a grubby (kudos and respect to all bridal dressmakers out there!).  It doesn't look as crisp after my bad ironing job, but it has to stand up to real life I suppose and it might actually improve and soften a bit with repeated washings.  Anyway all that is to say...wrinkle alert!


I used a stretch cotton, the instructions recommend lightweight jacket fabrics with some body, fabrics with elastane are ideal.  So I don't think it has to be a stretch fabric, just that it may be more comfortable if it is.

Here I am wearing it, I just threw it on over the navy jersey dress I was wearing so it looks quite formal here, but I think it will work equally well with jeans for a more casual look.


Monday 24 October 2016

BurdaStyle 10/2016 - 102 Knit Dress

UPDATE !! - If anyone else is struggling with the instructions on this pattern, I'm happy to report that blogger Pauline at Sew You Think You Can Knock Off has managed to make two gorgeous versions of this dress and has posted photos of the construction, visit http://sewuthinkucan.blogspot.hk/2016/11/burdastyle-102016-102-knotted-dress-i.html
Thank you Pauline!
La Karibane also posted a helpful comment in this post, interestingly both bloggers use French instructions, maybe they are better?!

==========================================
Last weekend I popped to the Hong Kong garment district area of Sham Shui Po solely to buy some white serger thread.  Needless to say a few pieces of fabric came home with me too, including this one which is very me - print, purple and jersey!


So as soon as I had finished the white project (coming up next) I moved straight onto this fabric and chose this jersey dress from the October issue of Burda (also very me).


10/2016 - 102


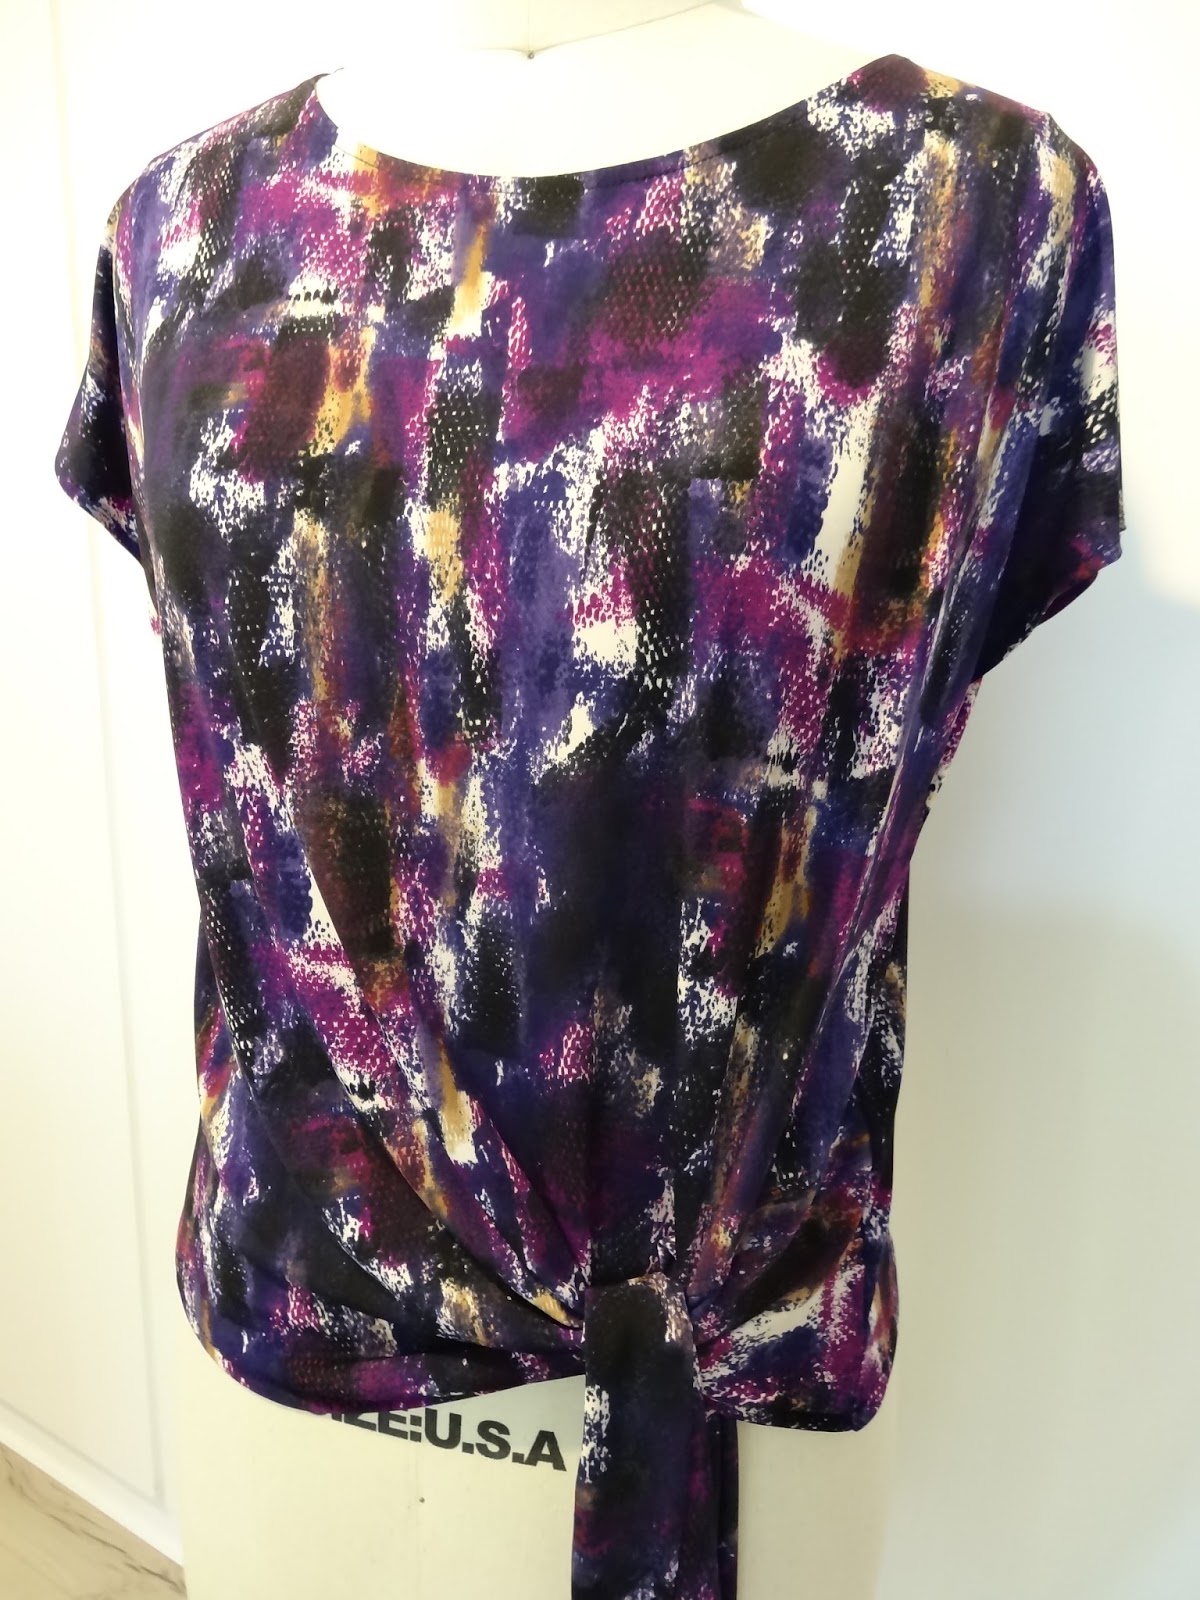
I made a couple of adjustments upfront, the neckline looked very wide so I narrowed it a bit and I also left off the sleeves on this version as it still isn't cool enough for long sleeves yet and I can always wear a light jacket over this dress when we do start getting some transitional weather.  I also switched the neck binding for a simple faced finish.

I started making this on Saturday so that I could wear it to a lunch with friends on the next day, quite a tight deadline, but it's a jersey dress - how hard could it be?

Things started well, the top is pretty straightforward and goes together quickly.  However when I got to attaching the skirt to the bodice I got completely confused.  I am convinced there is a step missing as there is nothing describing how or when to attach the front of the bodice to the skirt and all the references to facings, casings and attachment lines do not help.  I ended up with a raw edge on the bodice and a casing that I could not thread the elastic all the way through.  Time was getting on by now so out came the seam ripper and a radical solution.......


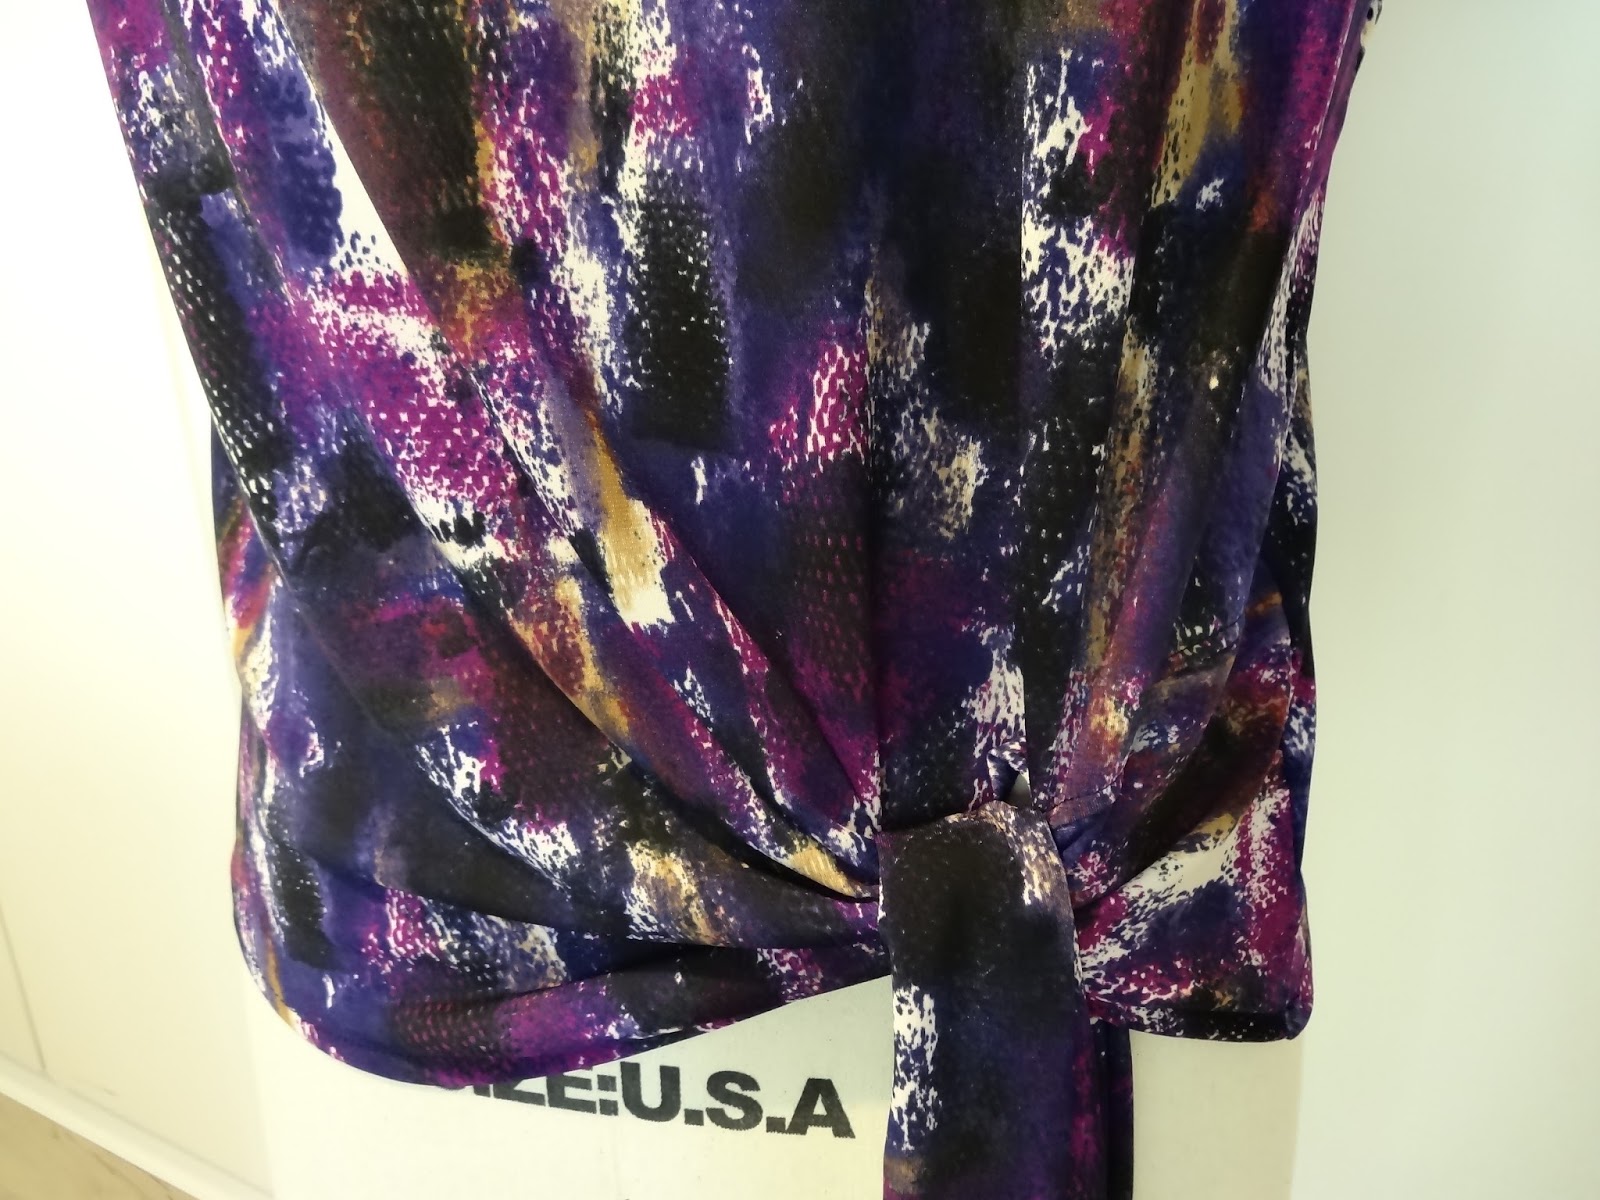
Yes, I had to admit defeat and decided to just make a separate top (which is pattern 101 in this issue) and skirt.  The top just tucks into the elasticated waist skirt, except at the knot area and then you just blouse the top a bit so that it looks exactly like the dress is supposed to and the 3cm wide elastic in the skirt holds everything in place.  No one need ever know!

Although it does pain me somewhat to be beaten by Burda's instructions, having separates is quite practical and each piece will definitely also be worn on its own.  I do want to try the long sleeved version later in the season - I'm thinking you need to first attach the skirt to the bodice with a normal seam allowance, except in the knot area and then fold and stitch the skirt somehow to create a casing.  If anyone manages to make sense of the instructions please do let me know what I missed!

I made it to the lunch in my fake dress and despite the frustrations of not being able to understand something that surely should be easy, I really like my new dress/ top/ skirt.  It / they will get a lot of wear and I am even planning on making this again although whether as one or two pieces I don't yet know!


It's pretty impossible to see the knot detail with this print so below are a few more detail photos.