Pages

Saturday 29 October 2016

BurdaStyle 06/2016 - 121 Jacket

It feels like a long time since I made a jacket which is odd since I love wearing them.  I decided I needed a simple unlined zip front cotton jacket and started digging through my BurdaStyle magazine stash (always a dangerous black hole to get into!).  Of course there were plenty of options, but having banged on and on about what a great year 2016 has been for Burda I felt I should make something current.

Now I am quite partial to a military styled jacket, however this one was shown in such a way that it almost veered off into costume territory, but the line drawing showed promise.

06/2016 - 121
06/2016 - 121 

06/2016 - 120 Cropped, zipped version
06/2016 - 121 Longer hook & eye version
I made the longer view (121), but with the zip from the cropped version (120) and omitted the tabs on the front.  Just for your information on the longer version they are cut in half and meet at the centre front seam which is finished with hooks and eyes, on the cropped version you would have to unbutton one side to get to the zip so you'd need to be committed to only wearing it done up if making that version.

This is actually a tall pattern, but apart from shortening both the sleeves and the bands by 1.5cm each I didn't make any alterations.

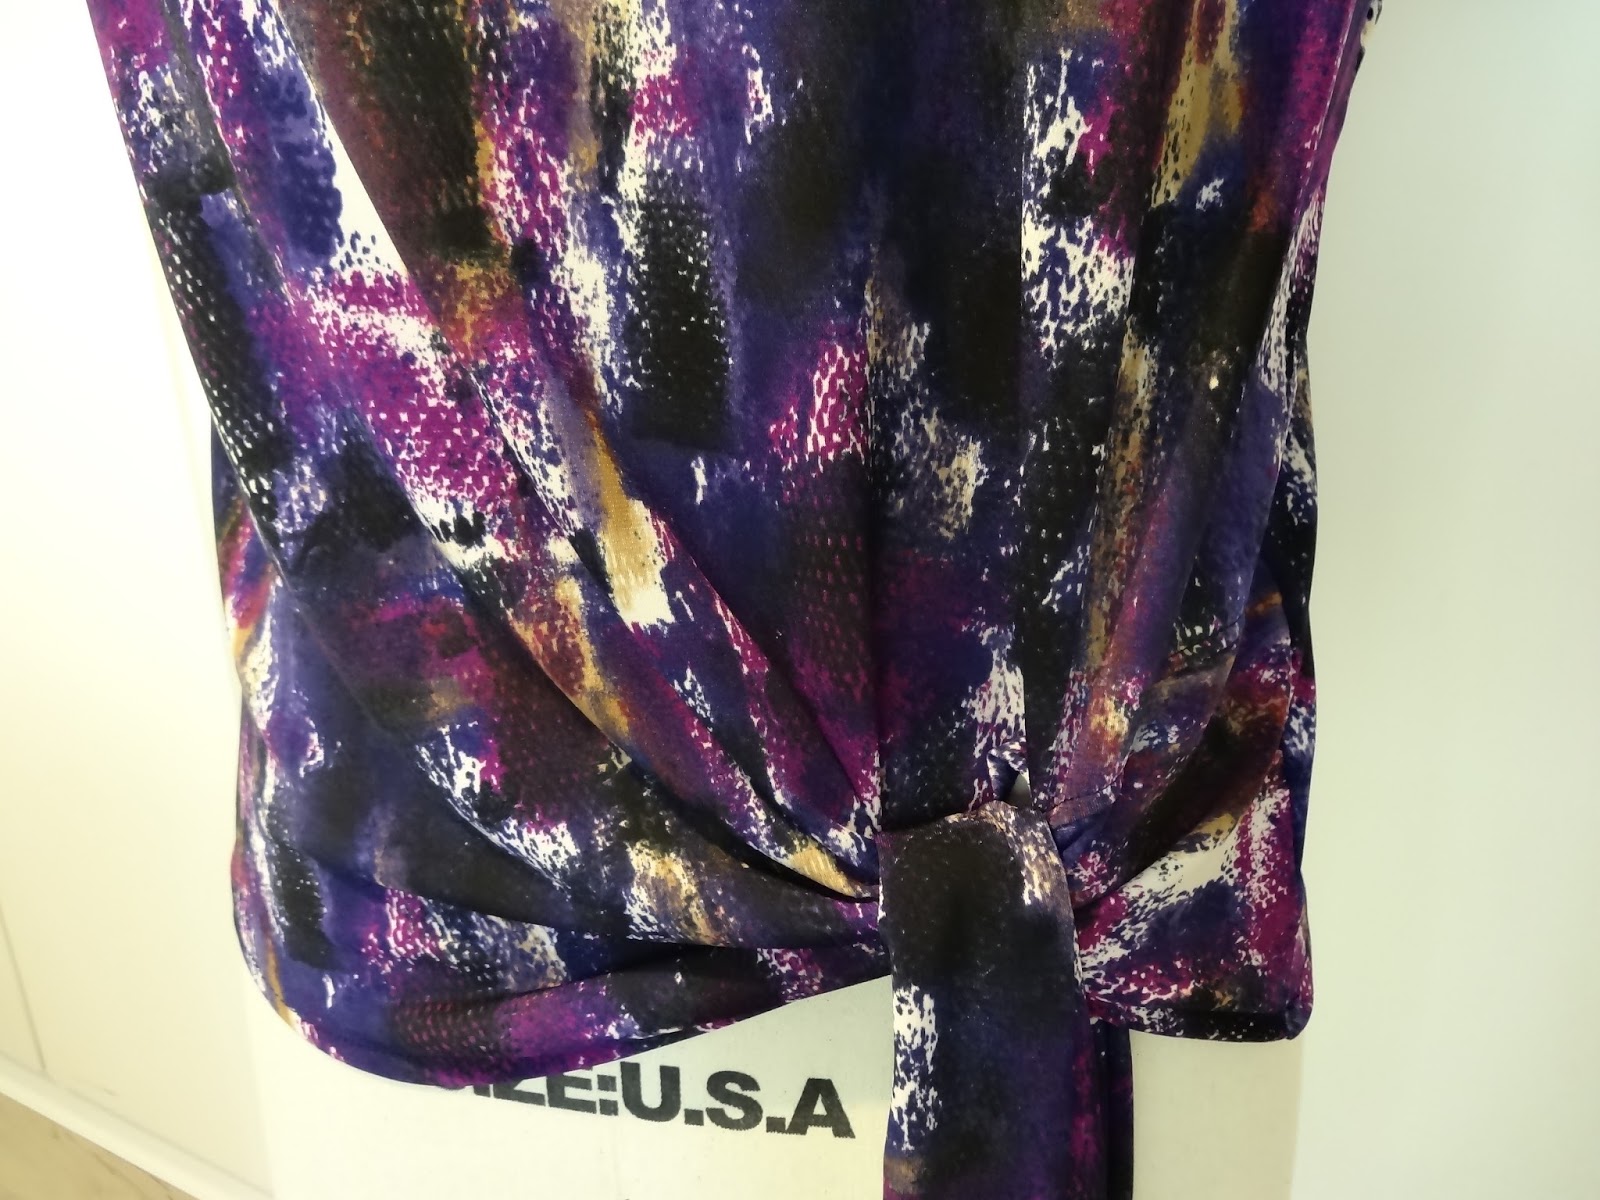
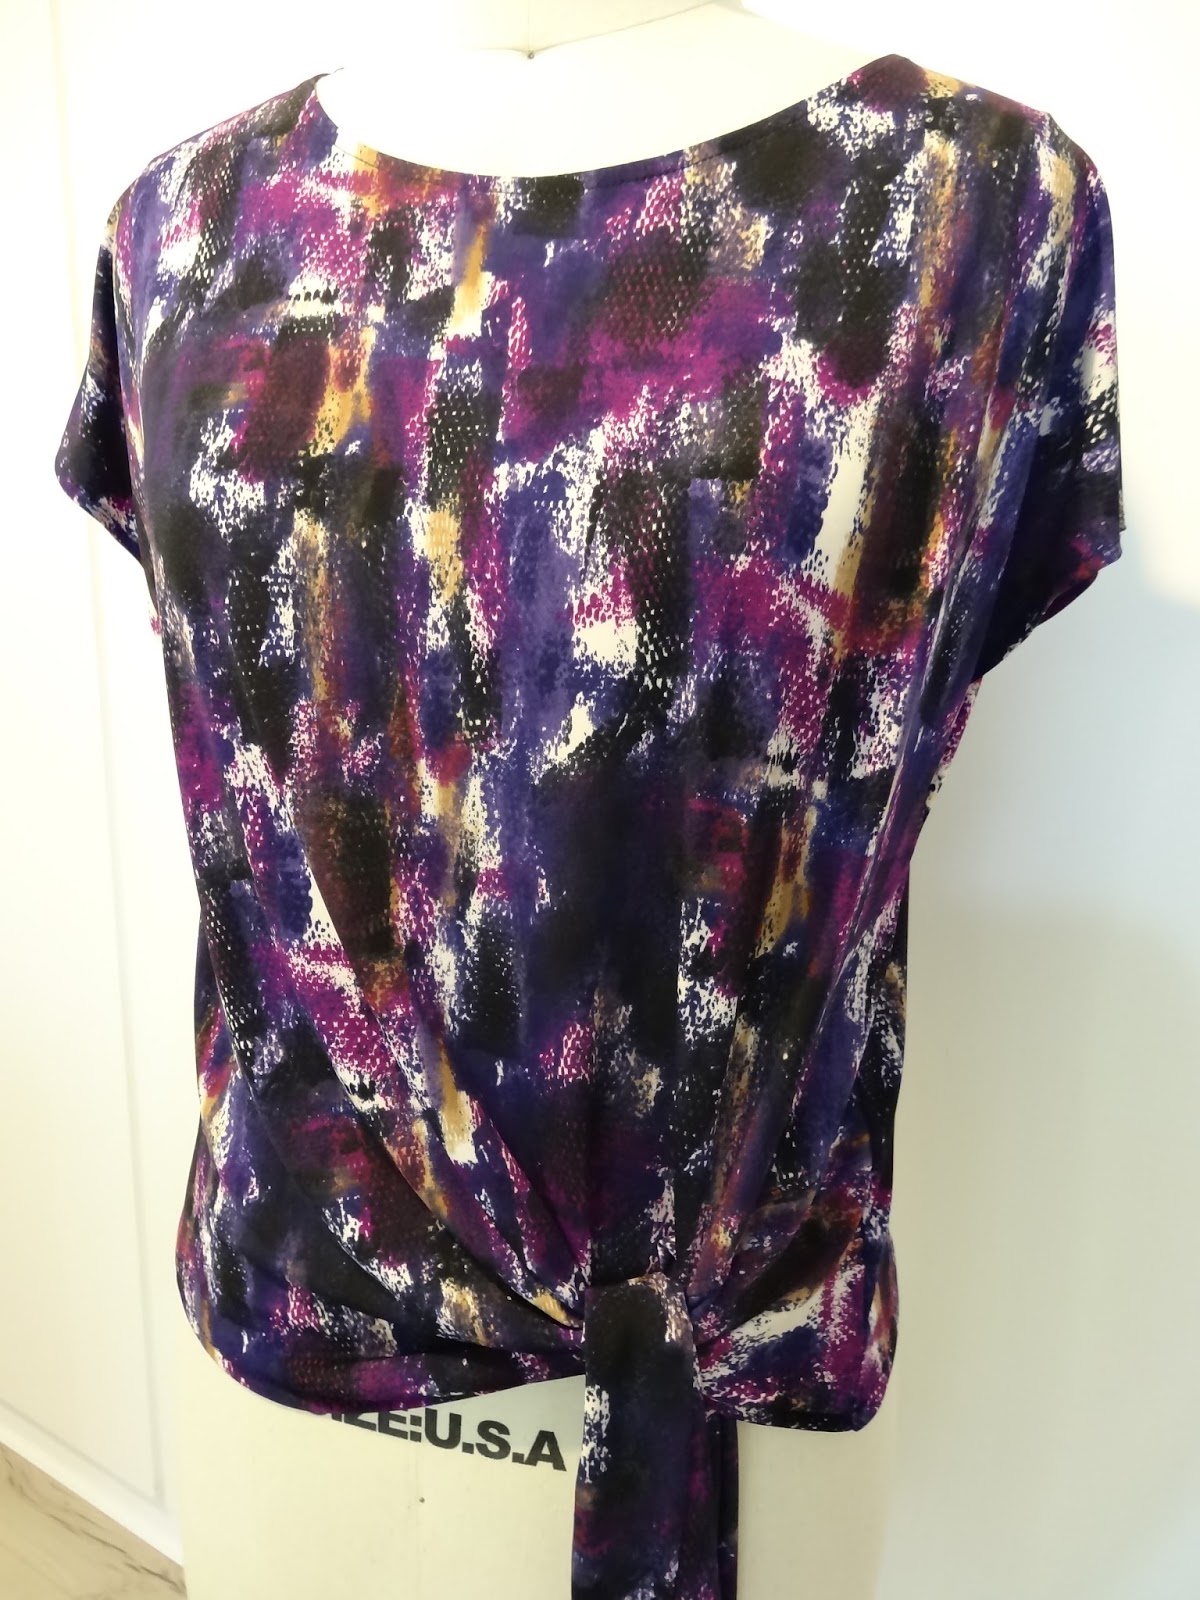
The jacket goes together quite easily and even the basic pattern has some nice subtle details - I really like the way the back wraps over the shoulder, the little double vent at the back and the cut of the sleeve makes it hang beautifully.  I wish I had taken photos as soon as I had finished it, but I washed it first since I had stabbed myself with pins and bled on it and just working with it had made it a grubby (kudos and respect to all bridal dressmakers out there!).  It doesn't look as crisp after my bad ironing job, but it has to stand up to real life I suppose and it might actually improve and soften a bit with repeated washings.  Anyway all that is to say...wrinkle alert!


I used a stretch cotton, the instructions recommend lightweight jacket fabrics with some body, fabrics with elastane are ideal.  So I don't think it has to be a stretch fabric, just that it may be more comfortable if it is.

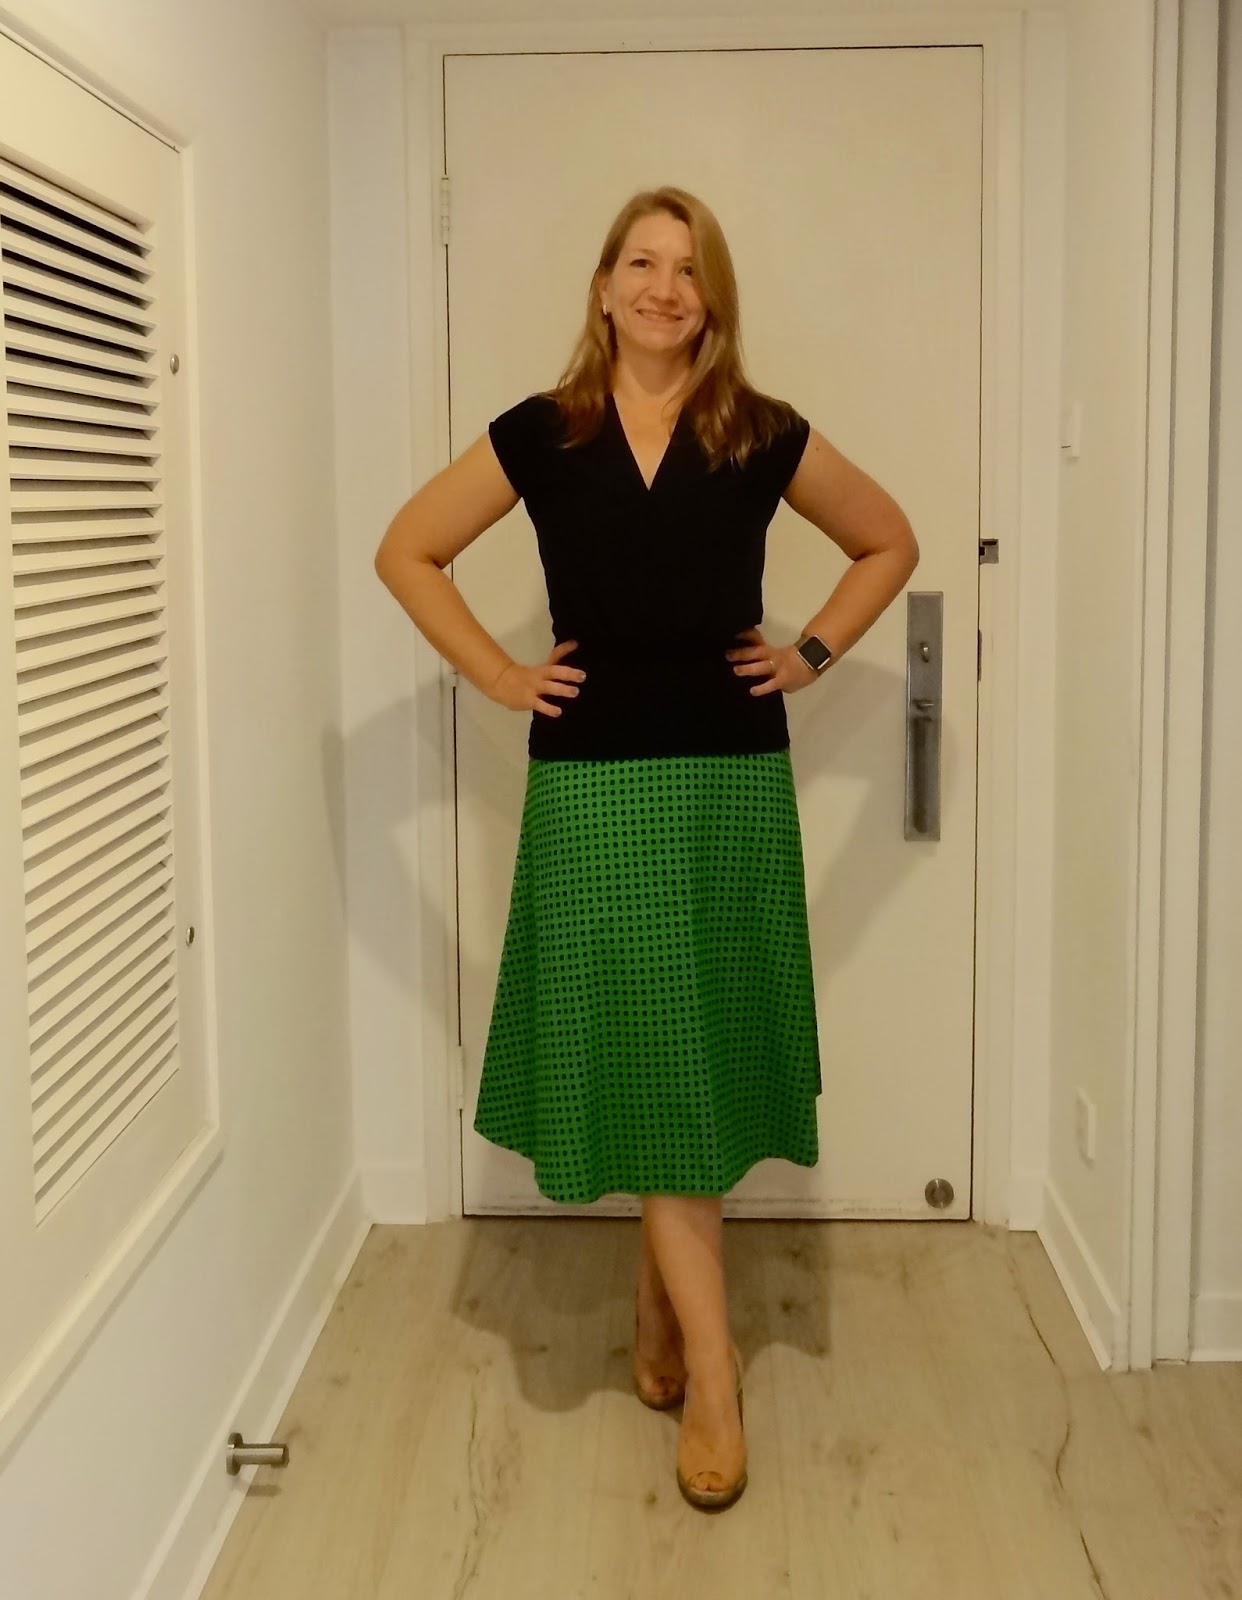
Here I am wearing it, I just threw it on over the navy jersey dress I was wearing so it looks quite formal here, but I think it will work equally well with jeans for a more casual look.


Monday 24 October 2016

BurdaStyle 10/2016 - 102 Knit Dress

UPDATE !! - If anyone else is struggling with the instructions on this pattern, I'm happy to report that blogger Pauline at Sew You Think You Can Knock Off has managed to make two gorgeous versions of this dress and has posted photos of the construction, visit http://sewuthinkucan.blogspot.hk/2016/11/burdastyle-102016-102-knotted-dress-i.html
Thank you Pauline!
La Karibane also posted a helpful comment in this post, interestingly both bloggers use French instructions, maybe they are better?!

==========================================
Last weekend I popped to the Hong Kong garment district area of Sham Shui Po solely to buy some white serger thread.  Needless to say a few pieces of fabric came home with me too, including this one which is very me - print, purple and jersey!


So as soon as I had finished the white project (coming up next) I moved straight onto this fabric and chose this jersey dress from the October issue of Burda (also very me).


10/2016 - 102


I made a couple of adjustments upfront, the neckline looked very wide so I narrowed it a bit and I also left off the sleeves on this version as it still isn't cool enough for long sleeves yet and I can always wear a light jacket over this dress when we do start getting some transitional weather.  I also switched the neck binding for a simple faced finish.

I started making this on Saturday so that I could wear it to a lunch with friends on the next day, quite a tight deadline, but it's a jersey dress - how hard could it be?

Things started well, the top is pretty straightforward and goes together quickly.  However when I got to attaching the skirt to the bodice I got completely confused.  I am convinced there is a step missing as there is nothing describing how or when to attach the front of the bodice to the skirt and all the references to facings, casings and attachment lines do not help.  I ended up with a raw edge on the bodice and a casing that I could not thread the elastic all the way through.  Time was getting on by now so out came the seam ripper and a radical solution.......


Yes, I had to admit defeat and decided to just make a separate top (which is pattern 101 in this issue) and skirt.  The top just tucks into the elasticated waist skirt, except at the knot area and then you just blouse the top a bit so that it looks exactly like the dress is supposed to and the 3cm wide elastic in the skirt holds everything in place.  No one need ever know!

Although it does pain me somewhat to be beaten by Burda's instructions, having separates is quite practical and each piece will definitely also be worn on its own.  I do want to try the long sleeved version later in the season - I'm thinking you need to first attach the skirt to the bodice with a normal seam allowance, except in the knot area and then fold and stitch the skirt somehow to create a casing.  If anyone manages to make sense of the instructions please do let me know what I missed!

I made it to the lunch in my fake dress and despite the frustrations of not being able to understand something that surely should be easy, I really like my new dress/ top/ skirt.  It / they will get a lot of wear and I am even planning on making this again although whether as one or two pieces I don't yet know!


It's pretty impossible to see the knot detail with this print so below are a few more detail photos.


Friday 14 October 2016

BurdaStyle 07/2005 - 128 Cold Shoulder Top

No that's not a typo this really is a pattern from 2005.  Cold shoulder tops are back so I dug out this old pattern to use up a remnant of black knit.  I'm surprised there haven't been more tops like this in Burda recently, but it does make me feel better about hoarding these aging pattern magazines.  I guess not many people still have this issue so I'll keep this brief!

Firstly for those of you that hate tracing Burda patterns this photo from the good old days where there were double the number of pattern sheets may make you envious....


Unsurprisingly I can't find the line drawing anywhere online, but Style Arc have a very similar pattern (the top of the sleeve is shaped differently) with an option for short or long sleeves.


I finished the neckline with a folded strip of fabric rather than just turning and stitching per the instructions - it's quite a curved neckline, I just couldn't see that working well.  However I did just turn and finish the shoulder edges with a twin needle, it's a bit rough and ready if I'm honest, but for a trendy item made from scraps it will do just fine!


Thursday 6 October 2016

Burda Style 04/2011 - 124 Flared Skirt

I can't really believe it's October and everyone is talking about fall and making coats.  It's still very warm here so forgive me if I'm still catching up with summery posts, no doubt I'll get to coats by about next May!

I found this bold eyelet fabric (I also got some in white) and knew that wanted to make a flared skirt with it for some reason.  Shown below with black cotton underlining.


Finding a pattern was surprisingly difficult.  I wanted as few seams as possible, but didn't have enough for a part circle skirt.  Eventually I used this Burda Style pattern from 04/2011 and combined the pattern pieces to eliminate the panel seams and moved the zip to the side seam (not really sure why it's not there in the first place, this skirt does have side seams).  It was a tall pattern (for 5'9 vs 5'6), but I ignored that and just left off the hem allowance.

http://www.burdastyle.com/pattern_store/patterns/a-line-skirt-042011


The drape would probably be better with the original panel seams in place since those side panels are supposed to be cut with the grain running down the centre.  I may well try this pattern again, but I really wasn't sure how this fabric would look with very visible seams.  I probably overthought this and no one would even notice them, but too late now!

I underlined with lightweight black cotton, I did consider separate lining, but decided that the seams would not look good or be very strong as the eyelet is so open.

The combination of the (now) a-line front and back and the slightly stiff fabric did make me worry a bit - like I would look like I was wearing a green triangle of garden netting and perhaps it does, but I really like the finished skirt and the midi length it ended up as, not a length I often wear.

Really ought to do a final press before taking blog photos!


It's been a bit quiet round here as I have just returned from an amazing vacation in Italy, visiting the Amalfi coast, Venice and Rome.  I took this skirt with me and wore it a few times so you get a photo that is not in my hallway, complete with packing wrinkles, oops!