I've decided to hop on this years BurdaStyle challenge bandwagon. I really want to get better use out of my Burda magazines this year instead of just talking about it. I still have a ton of things I still want to make from 2017, but let's see if I can manage at least one thing from each issue this year.
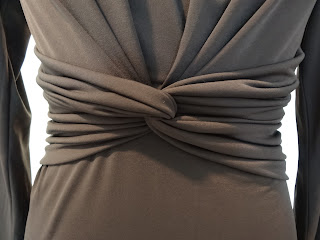
I cannot resist twisted, drapy details so choosing this top was a no brainer!
01/2018 - 102
I also like the dress, 101 (not on the BurdaStyle website yet, the image below is from the Russian site). Interestingly it has a separate upper bodice pattern piece because the neckline is quite a different shape. Apart from that the pieces are identical so you can swap them around depending on your preference. Personally I prefer the wider neckline and narrower shoulders of the top rather than the more close fitting jewel neckline of the dress so I'm glad I made the top first or I may not have realised from the line drawing. The dress also has a centre back zip which might be needed if you make the narrower neckline, but definitely doesn't need to be long if you don't mind putting things on over your head!

Being a print fanatic, my stash of plain jerseys is very limited, I used this dark brown colour, I'm not sure yet what to wear it with other than jeans, but that is a good start I guess. I think the pleating and twist detail shows up better in solid fabric, but I might try the dress in a print anyway. (I also really want to use more of my stash fabric this year!).
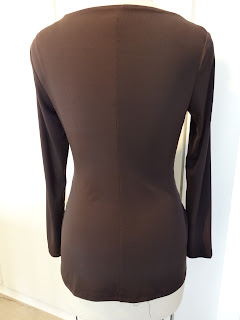
I used my usual size 38, grading out below the waist (it's a little big on my dressform, well I should say I have grown larger than my dressform - another resolution for the list). You do need to have the waist fitting closely to keep the twist in place. The back is plain, but the centre back seam gives it a bit of shape.
I found the instructions pretty good, of course the only potentially tricky bit is the twist pieces so I took some photos during construction. However I think the top (or dress) actually looks quite good even without the twist overlay if you want to keep things really simple. I just roughly pinned the front onto my dressform so you get the idea.
Twist construction tips
Keep the pattern piece in front of you when you make the pleats in each draped piece, each end is different. The notches on the top edge mark the centre and on either side of that is the slit marking. The bottom edge self facing has been turned to the wrong side and basted in place along with the pleats.
Fold one piece in half right sides together at the centre notch and stitch from the slit marking to the pleated edge, this will leave a small hole in the middle.
Turn right side out and open the piece flat, the seam you just stitched is across the centre, the top and bottom edges are faced and you have a small hole between the slit markings (on the left in the photo below).
Thread the other draped piece through that hole.
Fold it so that you can stitch this draped piece in the same way as before - from the pleated edge to the slit marking, right sides together.
It should look like this from the front when finished, you may need to manipulate the twist a bit to get it sitting neatly. The seams you sewed are across the centre now and the faced edges are top and bottom.
And from the back - kind of a mess! For non fraying fabrics, which many knits are you don't really need to finish the facing edges, they all end up hidden on the inside.
As I mentioned it is really important that the twist is taut across the front of the top or it will droop below the waist seam. I need to properly road test it to see if it may also need a couple of invisible stitches to hold it in place at the centre when it's being worn.
I had to edit the exposure in these photos so you can see the details. The pants are Jalie Eleanor in stretch denim.


